
Unpacking a kitchen is one of the most important tasks after you move. When you resettle into your new home, one of the first rooms you should set up is the kitchen.
After all, the kitchen is typically the heart of the home. It’s where meals are made, the family gathers, and people bond over meals and company. For most families, the kitchen represents the center of household activities.
It’s so important to make are you unpack your kitchen the right way so that you and your family can enjoy it to the max.
But, what exactly is the RIGHT way to unpack a kitchen?
Kitchens come in all shapes and sizes, but they all do one very important task: provide meals. Regardless of if you have a giant kitchen that would make Gordon Ramsey happy, or if you have a small kitchen that allows for just one or two people at a time, there is a right way to unpack the kitchen and organize your items.
Let’s dive into the 5 steps needed for unpacking a kitchen like a professional
Related:
Where to Put Things in Kitchen Cabinets
How to Maximize Space in a Small Kitchen | Kitchen Organizing
Netflix’s Get Organized with The Home Edit
How do I unpack and organize my kitchen?
As a professional organizer, I’ve pretty much mastered the technique of kitchen organization. To make things easy for myself, and for you, I’ve broken down kitchen organizing into 5 simple steps that anyone can follow.
- Identify your Kitchen’s Work Triangle
- Identify Major Zones
- Decide on the location for everyday dishes and utensils.
- Find overflow sites
- Maximize hidden storage
Below I’ll go in details about how to follow each of these steps so that you can have the perfect kitchen. If you’d prefer to watch this information in a YouTube video, check my kitchen organizing video’s from my YouTube Channel below:
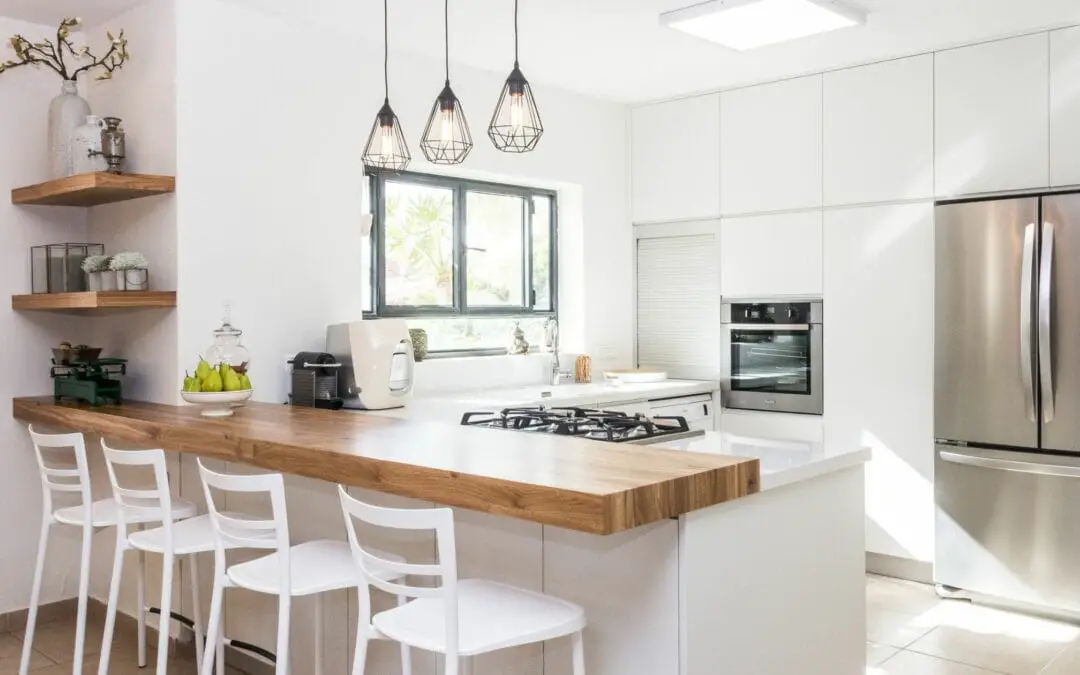
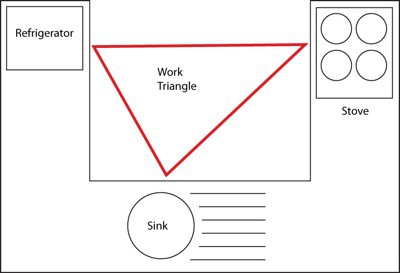
Step 1: Identify your work triangle
The most frequently used space in your kitchen will be within the work triangle. According to the definition, a kitchen work triangle is a concept used to determine efficient kitchen layouts that are both aesthetically pleasing and functional.
The 3 points of the triangle are made up of the sink, stove, and refrigerator.
Start by identifying those three areas (sink, stove, and refrigerator) and draw imaginary lines connecting them to make a triangle. See the image below.
If you have a galley kitchen or if your stove/sink/fridge are next to each other, you will need to rely heavily on modifications like adding extra wall storage and working surfaces.
▶ How to Maximize Space in a Small Kitchen


Step 2: Identify major work zones
Once you establish your primary work zone by using the triangle method, the next thing you’ll need to do is to identify major work zone areas.
Map out these zones using temporary sticky notes before unpacking the first box. They are :
- Cooking
Where: Around or to the right of the stove
What: Pots, pans, and tools used during cooking, like wooden spoons - Prep Work
Where: Close to the largest work surface within the work triangle
What: Mixing bowls, measuring cups, and tools used to prepare meals - Serving and Entertaining
Where: Closer to the dining area with the exception of everyday utensils
What: Large serving platters, carafes, cake stands, holiday-themed items - Food storage
Where: Locate a space near the refrigerator but away from household cleaners
What: Tupperware, ziplock bags, aluminum foils - Clean-up
Where: Typically under the sink and additional cabinets around the sink if not needed for prep and cooking
What: Towels, rags, sponges, cleaning solutions
Step 3: Decide on the location for everyday dishes and utensils (where to put things in kitchen cabinets)
A question that gets asked often is “how should I arrange my kitchen items?”. This is such an important step because it is what ultimately sets you up for success.
So, the next thing to do when unpacking a kitchen is to set up your most frequently used kitchen items first.
Do this by choosing a drawer within the work triangle (stove, sink, fridge) and close to the dishwasher to unpack everyday cutlery like forks and spoons. Then, choose a cabinet using this same method to unpack everyday dishes and glasses.
In small kitchens, if cabinets and drawers are unavailable, these everyday items can be placed in a cart or carafes on the counter.


Step 4: Find overflow sites
Often there is just not enough room for everything to fit in the kitchen (unless you’re lucky enough to have your dream kitchen). If you are downsizing to a smaller kitchen you will need to identify satellite locations for extra items.
You can find extra space in your kitchen by doing the following:
- Move serving and entertaining pieces to the dining room
- Set up shelving in the garage or basement to store overflow appliances and less frequently used cooking tools
- Bulk cleaning and paper products can find a home in the laundry room
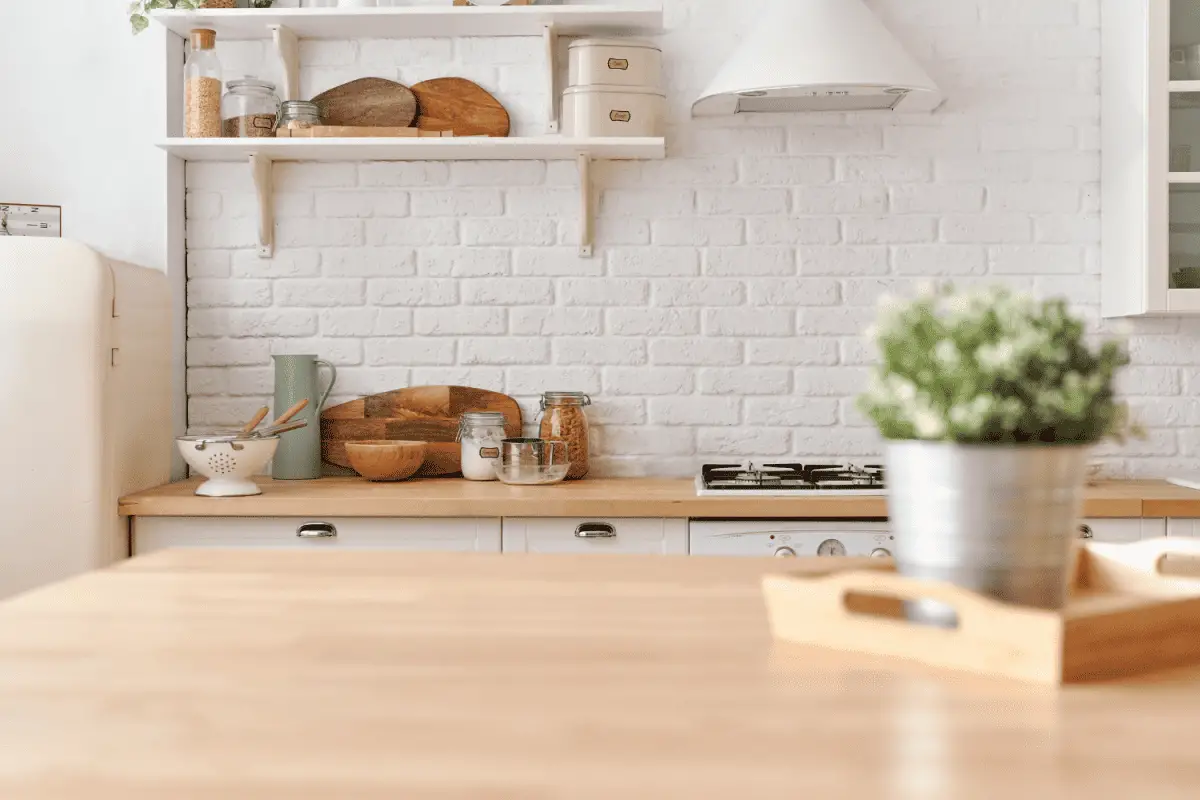
Step 5: Maximize hidden storage
Kitchens are full of nooks for hidden storage. If you’re like most people, you will want to get use out of every inch of your kitchen. Here are my favorite ways to add more space to a kitchen:
- Add cup hooks and stemware holders to the underside of cabinets
- Install spice racks on open walls. In addition to spices, store teas, medicines, and small prep tools on these mini-shelves
- Hang a pot rack. Getting pots and pans out of your cabinets can free up a ton of space
- Place shelf stackers inside your cabinets to double your storage for plates, bowls, and prep tools on these mini-shelves mugs


Unpacking a kitchen doesn’t have to be difficult. If you know what you’re doing from the moment you enter the kitchen, you can easily create a nice flow that will make the kitchen the heartbeat of your home.
Wondering how to start your own kitchen organizing business?
Are you someone who LOVES organizing (unpacking a kitchen, sorting closets, color coding displays, etc.) especially kitchen items? Perhaps you should consider starting your own organizing business (like I did!).
There are many things to consider when starting an organizing business including:
- What will I name my business?
- Where will I find clients?
- How do I become an organizer?
- Do I need to be certified?
- How will I structure my business?
You have come to the right place! Check out my other blogs on starting a decluttering business:
How to Start a Professional Organizing Business
The Ultimate Reading List for (wannabe) Certified Professional Organizers
How to Create a Name for your Organizing Business
7 Ways to Get Clients for your Professional Organizing Business
Get a copy of my free guide “Professional Organizer’s Launch Guide” HERE
When you are ready to start your own decluttering business, check out all my courses on working as a professional organizer in my course bundle for the best price on courses to create and market your organizing business and design a system of organization that will work with all your clients no matter how small or large their volume of clutter!
Happy Organizing!